A quick guide for developing KDE Plasma widgets using bash
Long story short, I wanted to develop a KDE Plasma widget for personal use that will display the processor temperature. There are a few ways in which this can be achieved, one option would be to use QtCreator and develop a conventional widget using QML and Plasma Components, or we could develop one using Python or Ruby with PyQt and Ruby-Qt, or use the good ol’ conky. For my current task however, the needed data can be obtained from the sensors utility and it just needs to be shown by the widget. The three options above are simple but seemed a bit overkill for this purpose. I quickly searched if something similar to i3bar of i3wm(which allows bash scripts to be used as status) is available to KDE Plasma and found Command Output, an actively maintained plugin that does just that. It worked perfectly and I had my widget working within ten minutes. This guide will walk you through making two widgets — the temperature one mentioned above and a weather widget that shows the current weather. It should be noted there are some obvious disadvantages to this approach, the main one being the fact that we are only making a bash script and depending on another “actual widget” to do the main task. Also, we can only display text using this method. But if we can afford these disadvantages, for tasks like I mentioned, using Bash has the tremendous advantage of having a bunch simple and powerful *nix utilities like grep, awk, sed and cut at our disposal to glue together a solution that just works! Let’s get started.
1. Processor Temperature Widget
The goal for this widget is pretty simple — create a Bash script or one-liner scrape the needed data from sensors utility. This bash one-liner needs to be placed into the Command Output widget, if you can’t come up with a one-liner and you have a bash script, then it needs to be turned into a command(more on that later in case you don’t know how to). Then Command Output will run the Bash script every 1 second(or as configured) and display the result as a widget. The 50.0 C in the below image is our widget, it updates every 10 seconds to show the latest processor temperature:

1.1 The Bash Script
The one-liner I came up with for getting the needed temperature from sensors is:
sensors | head -n 3 | tail -1 | cut -c 17-22
The |(pipe) is used to pass output of one command to another. So, the output of sensors is passed to head -n 3,which does some processing and passes it to tail -1 which again does some processing and finally it passes it to cut -c 17-22. We can chain any such number of commands using | for getting desired output. Now, I’ll show you how I reached that one-liner:
First, let’s see the output of sensors which we know contains the information we need:
coretemp-isa-0000
Adapter: ISA adapter
Package id 0:  +47.0 C  (high = +86.0 C, crit = +100.0 C)
Core 0:        +43.0 C  (high = +86.0 C, crit = +100.0 C)
Core 1:        +47.0 C  (high = +86.0 C, crit = +100.0 C)

acpitz-acpi-0
Adapter: ACPI interface
temp1:        +48.0 C  (crit = +99.0 C)

thinkpad-isa-0000
Adapter: ISA adapter
fan1:         723 RPM
temp1:        +48.0 C
temp2:         +0.0 C
temp3:        +48.0 C
temp4:         +0.0 C
temp5:        +40.0 C
temp6:        +61.0 C
temp7:        +32.0 C
temp8:        +61.0 C

BAT1-acpi-0
Adapter: ACPI interface
in0:          12.45 V
sensors shows the reading of available sensors in our computer. On the above data, what we’re looking for is the 47.0 C on the line Package id 0: +47.0 C (high = +86.0 C, crit = +100.0 C). We just need those 6 characters(47.0 C). For extracting such arbitrary data, we have some pretty cool utilities like head, tail, cut, awk etc. and we can use them in combination like follows.
Our required data is on 3rd line, using head and tail we can get the line. head -n 3 is used to get the first 3 lines of the sensors output and tail -n 1 is used to get the last one line of those three lines passed by head. Output after each chaining is shown below.
Output of sensors | head -n 3:
coretemp-isa-0000
Adapter: ISA adapter
Package id 0:  +47.0 C  (high = +86.0 C, crit = +100.0 C)
Output of sensors | head -n 3 | tail -n 1:
Package id 0: +47.0 C (high = +86.0 C, crit = +100.0 C)
Now that we’ve got the line which contains the required data, the next step is to get the needed data from the line. For this, we can use cut which is used to select a section of text from each line. cut has some options that are worth looking into(use this guide). On the above line, characters from 17 to 22 are what we need. To select(and print) characters from 17 to 22, cut -c 17-22 can be used.
The output of sensors | head -n 3 | tail -1 | cut -c 17-22 is:
47.0 C
That is our needed output and that is our needed one-liner. There are more that one way to does this, and definitely shorter and better ways of doing this but as long as it works it doesn’t matter 😉.
1.2 Using the Bash Script on Command Output
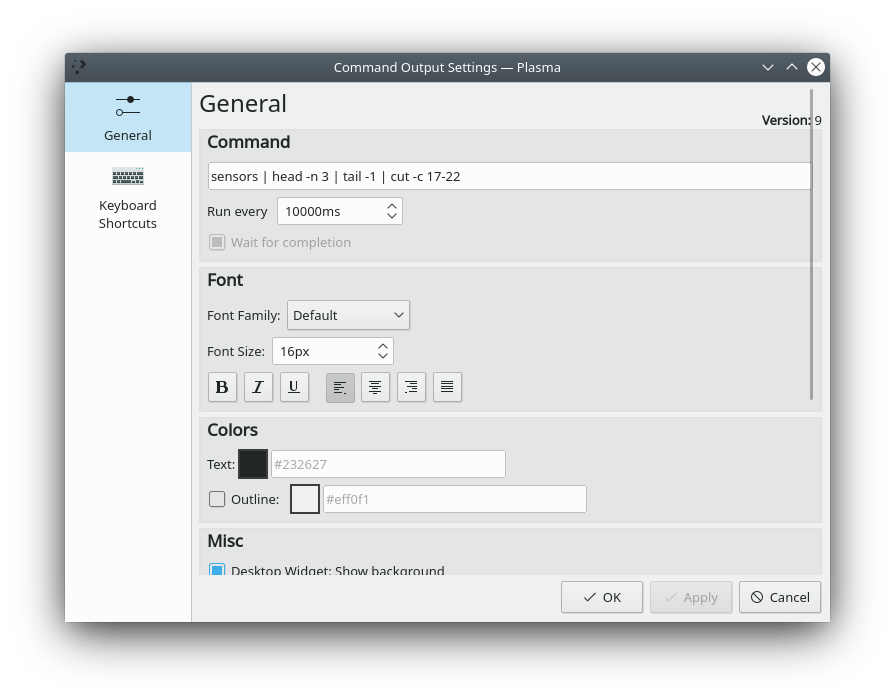
After you install the Command Output widget, drag and drop the widget into the panel. It will display Test . Right click on it and select “Configure Command Ourput…". A new window will popup. On the command textbox, add our one-liner sensors | head -n 3 | tail -1 | cut -c 17-22 as follows:
 I’ve upped the delay from default 1000ms(1 second) to 10000ms(10 seconds) so that the temperature changes show every ten seconds instead of one.
2. Weather Widget
The weather widget gets the current weather of the city of our choice and displays it on the desktop. Since it involves getting data from the Internet, the script is a little bit longer but still is a one-liner and simple. The one I came up with is:
curl -s https://mausam.imd.gov.in/imd_latest/contents/current_weather.php\?obs_name\=THIRUVANANTHAPURAM\&submit\=Go | grep "<h2></br>Thiruvananthapuram</h2>" -A 17 | tail -1 | tr -s " " | sed 's/ <td>//' | sed 's/<\/td>//' | fold -w 20 -s
I first tried finding a free API that gives out weather data but almost everything I found needs an account to access. I finally decided to scrape the required data from https://mausam.imd.gov.in, a government website that provides weather data of Indian cities. Let’s see what each command above does one by one:
Output of curl -s https://mausam.imd.gov.in/imd_latest/contents/current_weather.php\?obs_name\=THIRUVANANTHAPURAM\&submit\=Go
curl downloads data from the Internet. The output for the above is just the HTML source code of this webpage: https://mausam.imd.gov.in/imd_latest/contents/current_weather.php?obs_name=THIRUVANANTHAPURAM&submit=Go that shows the current weather data of Thiruvananthapuram. Notice this part of the source code:
<h2></br>Thiruvananthapuram</h2>
<table id="seven_days1" style="width:100% ; align:center;">
<thead>
<tr class="t_head">
<th>Date</th>
<th>Temp(°C)</br>min | max</th>
<th></th>
<th>Weather</th>
</tr>
</thead>
<tbody>
<tr>
<td>20th December</br>Friday
</td>
<td>25.0°C | 27.0°C</td>
<td><img src="assets/current_img/35.png"; style="height:30px;width:30px;"></td>
<td>Generally cloudy sky with one or two spells of rain or thundershowers</td>
</tr>From the above, “Generally cloudy sky with one or two spells of rain or thundershowers” is our required data. The goal is simple, get that data from the source code but this time, we can’t use head and tail like on the previous case because our “required line” changes each day as the weather is updated. We’ll need to use grep.
Output of curl -s https://mausam.imd.gov.in/imd_latest/contents/current_weather.php\?obs_name\=THIRUVANANTHAPURAM\&submit\=Go | grep "<h2></br>Thiruvananthapuram</h2>" -A 17
grep is used for matching regular expressions. When given a pattern(regular expression), it prints the line which contains that pattern. Since <h2></br>Thiruvananthapuram</h2> is the only data that is we can anchor to(because it is the only thing that doesn’t change), we search for it and use -A 17 to also show 17 lines after the matching line. The output is:
<h2></br>Thiruvananthapuram</h2>
<table id="seven_days1" style="width:100% ; align:center;">
<thead>
<tr class="t_head">
<th>Date</th>
<th>Temp(°C)</br>min | max</th>
<th></th>
<th>Weather</th>
</tr>
</thead>
<tbody>
<tr>
<td>20th December</br>Friday
</td>
<td>25.0°C | 27.0°C</td>
<td><img src="assets/current_img/35.png"; style="height:30px;width:30px;"></td>
<td>Generally cloudy sky with one or two spells of rain or thundershowers</td>
The last line is our needed data, and we can use tail to get it.
Output of curl -s https://mausam.imd.gov.in/imd_latest/contents/current_weather.php\?obs_name\=THIRUVANANTHAPURAM\&submit\=Go | grep "<h2></br>Thiruvananthapuram</h2>" -A 17 | tail -1:
<td>Generally cloudy sky with one or two spells of rain or thundershowers</td>
Which has a lot of trailing spaces before <td>, we need to use tr -s " " to squeeze multiple spaces to one space. tr is the translate tool and it is used to change characters from one to another.
Output of curl -s https://mausam.imd.gov.in/imd_latest/contents/current_weather.php\?obs_name\=THIRUVANANTHAPURAM\&submit\=Go | grep "<h2></br>Thiruvananthapuram</h2>" -A 17 | tail -1 | tr -s " " | sed 's/ <td>//' | sed 's/<\/td>//':
Generally cloudy
sky with one or two
spells of rain or
thundershowers
sed, stream editior, is a very powerful utility that process stream of text. In this case, we use the simple form sed 's/old/new/' to replace <td> and </td> with blank character.
Ouptput of ...... | fold -w 20 -s
fold is used to wrap words to a specific width. Output is:
Generally cloudy
sky with one or two
spells of rain or
thundershowers
This output is better than a single long line.
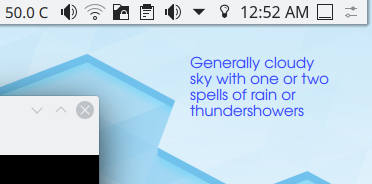
Put this one-liner in a new Command Output widget, this time drag it to the desktop. Make sure to up the update interval to 30 minutes or more otherwise you’re polling the website and wasting data. The resulting widget look something like this:

If you ended up with a Bash script
Bash is a scripting language and have many more features like loops and arrays. These can be used for creating more complicated widgets. Use this guide to learn how to make awesome bash scripts. Once you have made the script that outputs needed data, we cannot just input the contents into the Command Output widget.
Suppose some_script is the filename of your script. First make it executable and then move it to /usr/local/bin/. Then on the command textbox of Command Option, input some_script.